
In Part 1 of this two-part series, we discussed the benefits of indoor cycling workouts, what apps are available, and the things you’ll need to get started with indoor training. This time around, we’ll go over how to get everything set up for your first session, what to do first, and some tips for making the most of your workouts!
Setting things up
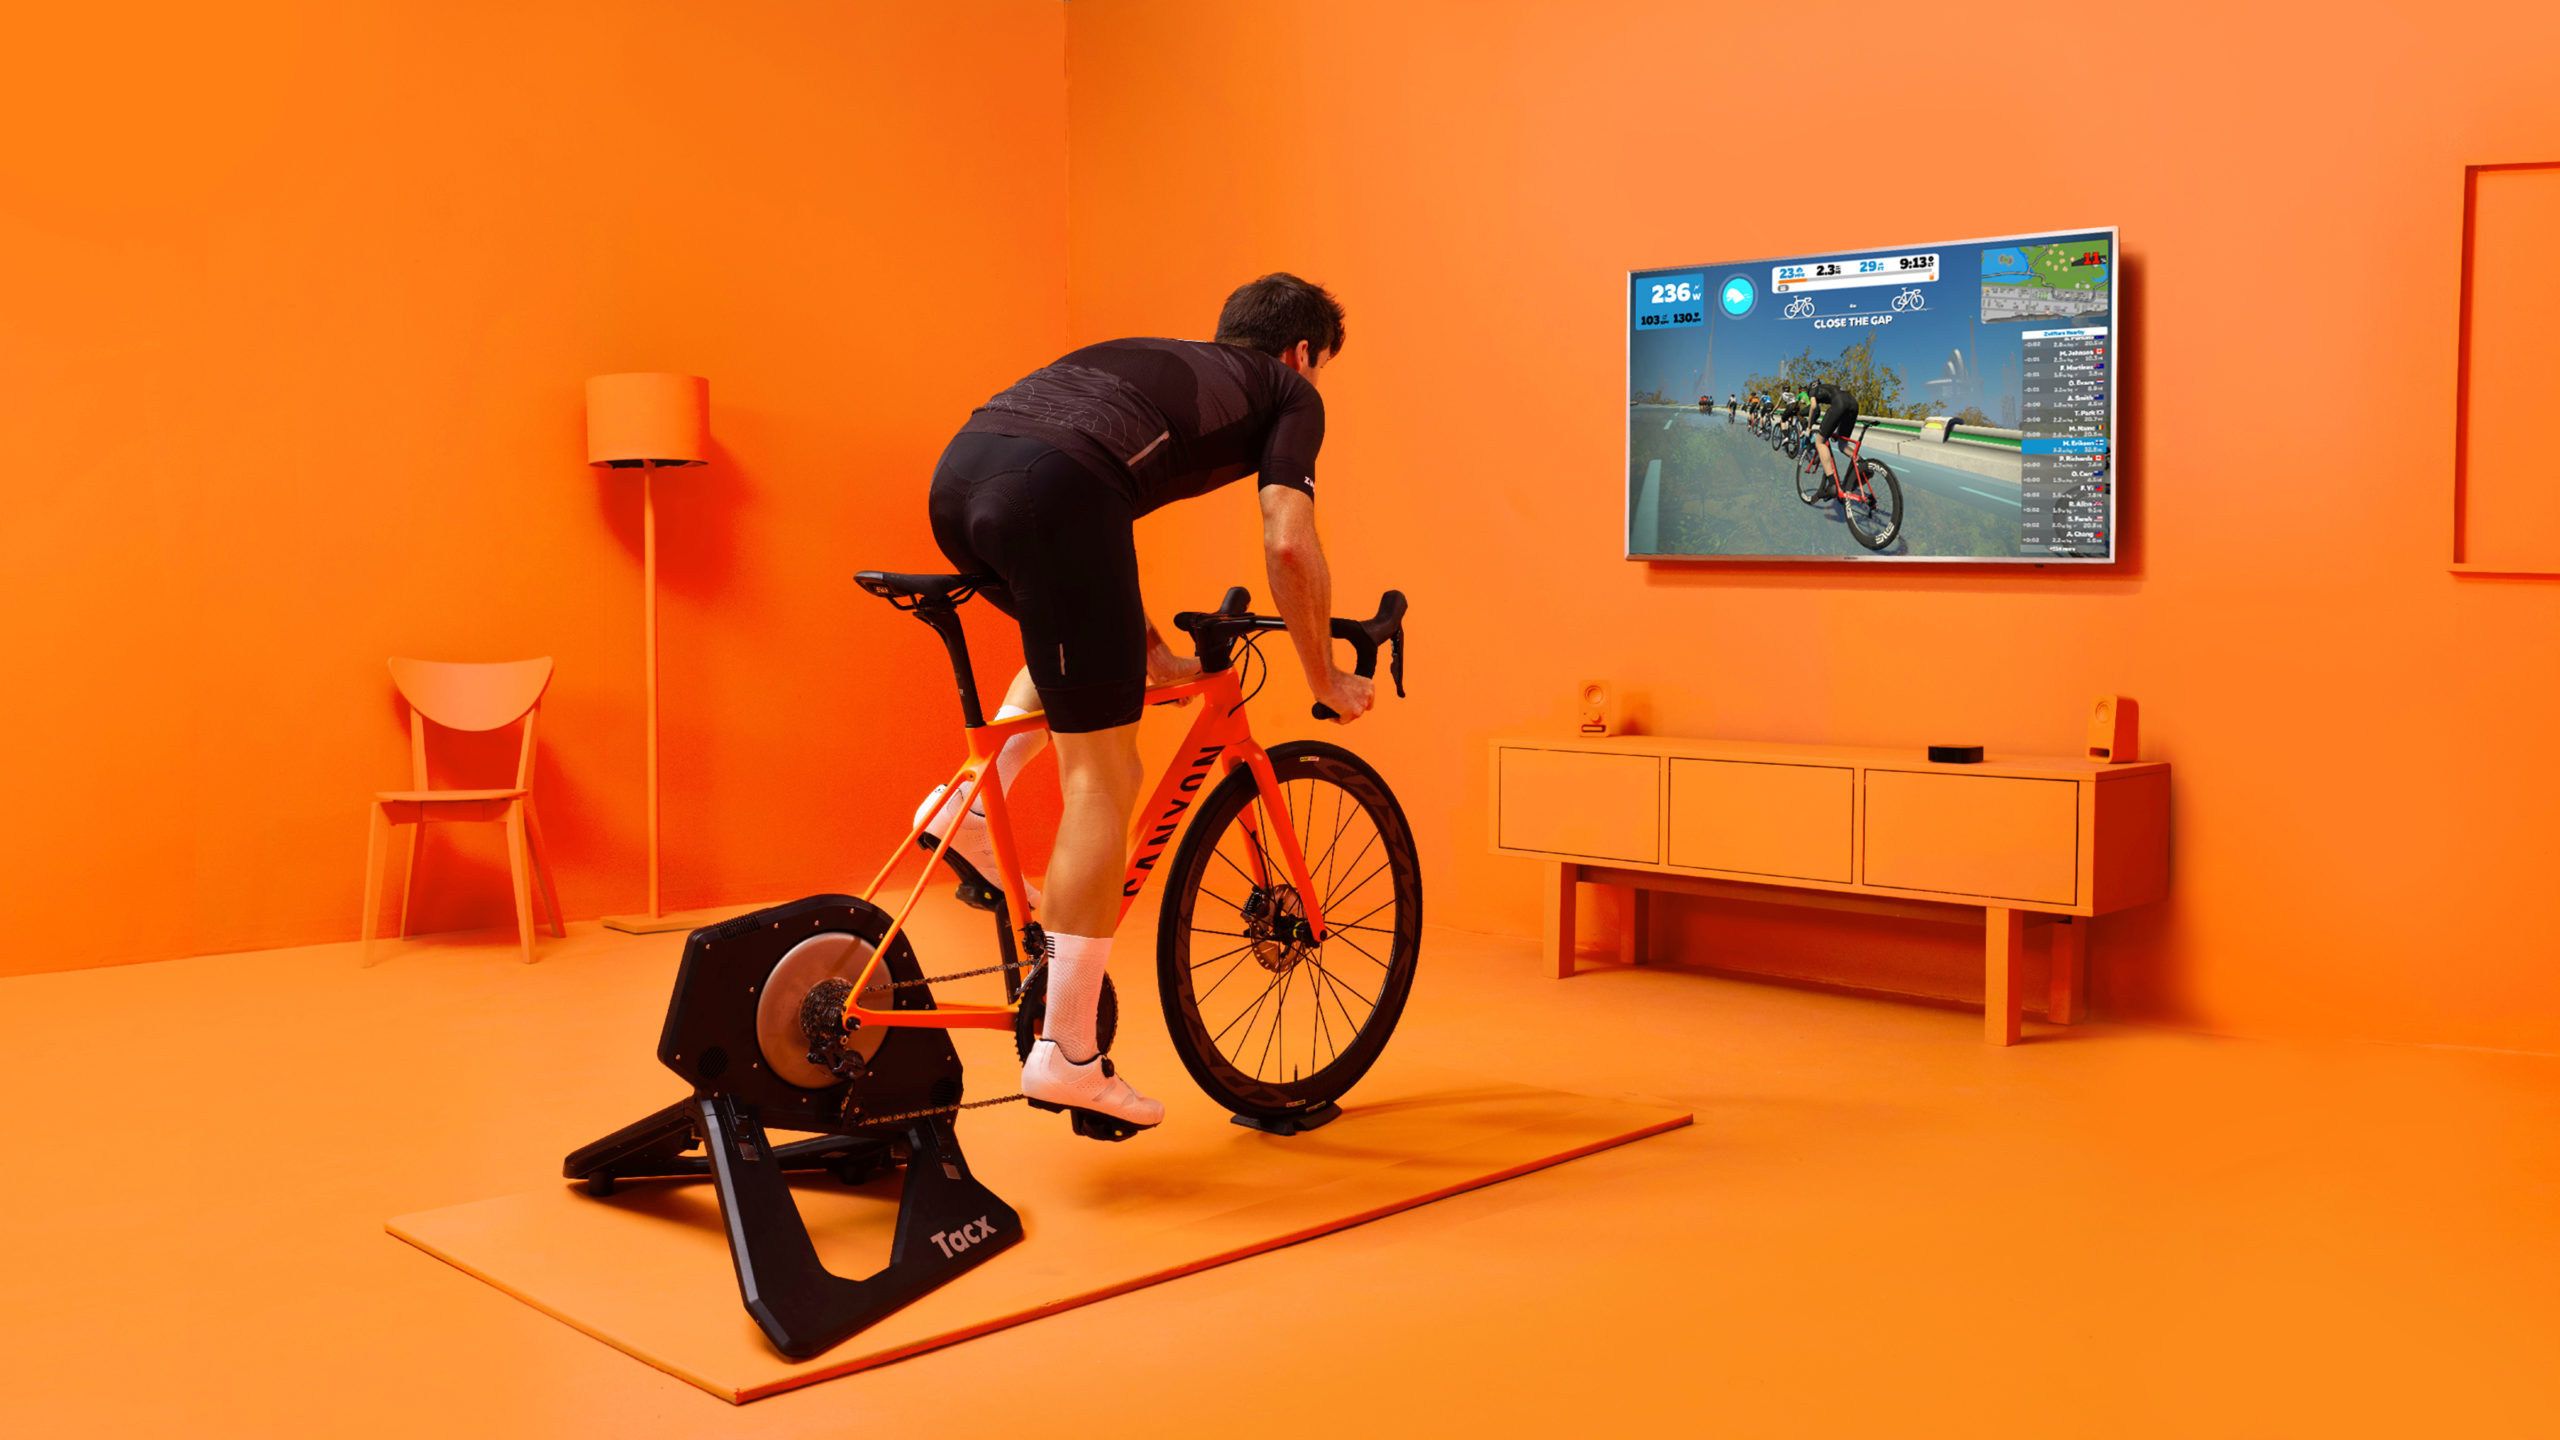
First, you’ll want to put your bike on the indoor trainer. There are quite a number of ways to do this and you will have to consult your trainer’s specific instructions to get things right. Most trainers will require you to swap out your rear skewer for one that is compatible with it. This means that you will need to make sure that you have a training skewer specific to your bike (TA or QR) that is compatible with the trainer. While some trainers now come with training skewers specifically for thru-axles, most still come with a training skewer specific for use with bikes that use quick release. Other trainers require you to remove your rear wheel, and mount your bike’s rear end to the trainer which has its own cassette.
If you are using a “dumb trainer,” you will now have to install sensors to your bike. Older sensors usually mount onto your bike’s non-drive chainstay, and rely on a magnet on the spoke for speed, and another magnet on your bike’s crank arm for cadence. Newer sensors are easier to install, with speed sensors attached to the bike’s rear hub by rubber strap, and cadence sensors attached to a crank arm in the same fashion. These newer sensors no longer require magnets so there is less to work through. It’s important to note that some speed sensors require you to input your wheel circumference, but your user manual can help with this as there are estimates for most wheel and tire sizes.
Finally, you will have to log onto your indoor training app and pair your smart trainer or sensors if you’re using a “dumb trainer.” Setup shouldn’t take too long, and the apps are usually intuitive and provide documentation for the more common trainers in the market.
Where to start
Now that your training rig is set up, you need to “pair yourself” to the app by testing for your FTP. Your FTP is the highest power you can sustain for one hour and is the basis for how the app will calibrate its workouts for you. Your chosen app should have numerous options for how to calculate your FTP, usually under a section labeled “FTP tests.” The most obvious way to do this is by literally cycling at the highest power output you can sustain for an hour—but there are several drawbacks to this. The most obvious is a longer period of pain and suffering. But novice cyclists are also notoriously bad at pacing themselves so it is very possible to burn yourself out too early if you do a full hour FTP test as a new cyclist, in which case your FTP will be calculated much lower than if you pace correctly. If the shorter option is available, you should go for it and trust in the algorithms used by the app instead.
After your FTP test, you should be able to choose what kind of training program you want from those offered in the app, and the power intensity should be tailored to your specific fitness level.
Tips and important reminders
Lastly, here are some of our favorite tips for training indoors!
First, set your bike up properly. Use a riser block to make sure that your bike’s front end is even with the rear. If you don’t have a riser block, find a phonebook or get a stack of old newspapers to put under your front wheel. It is also crucial to set your trainer to the specified resistance if you’re using a “dumb trainer,” and to use recommended same tire pressure consistently if you’re using a trainer that requires you to keep the rear wheel on the bike.
You should also set your training station up with proper ventilation, and access to hydration. You might be surprised by how much heat you’ll be generating, and how much sweat you’ll produce. Aiming an electric fan at your head not only helps with the heat, it also simulates riding into the wind to develop headwind mental resilience (HMR)! You should also drink enough to replace all that sweat, or you will find your power dropping before long.
It is also important to warn people around your residence before you start your workout, because some of the noises you will be making can be frightening without context.
Finally, that FTP is key to the accuracy of your workouts so benchmark it if necessary. If the workouts seem harder than “too hard” and can’t be sustained, there is no shame in lowering the set FTP and building up gradually.
—
You can click here If you missed Part 1 of this series, Do let us know if you have tips that we missed out on!


Leave a Comment